


Once upon a time, telescopes were invented to make far away objects appear as if they were closer. One thing led to another, and someone decided to mount a telescope onto a rifle. Nearly 100 years after that first fateful attempt, rifle telescopes were finally truly ready for the field. The technology had advanced, adding a reticle, different magnifications, prescription correction, achromatic lenses, and even elevation / windage adjustment. One of the later improvements, and the one we're most excited about for this scope, is that of parallax adjustment.
About the Scope
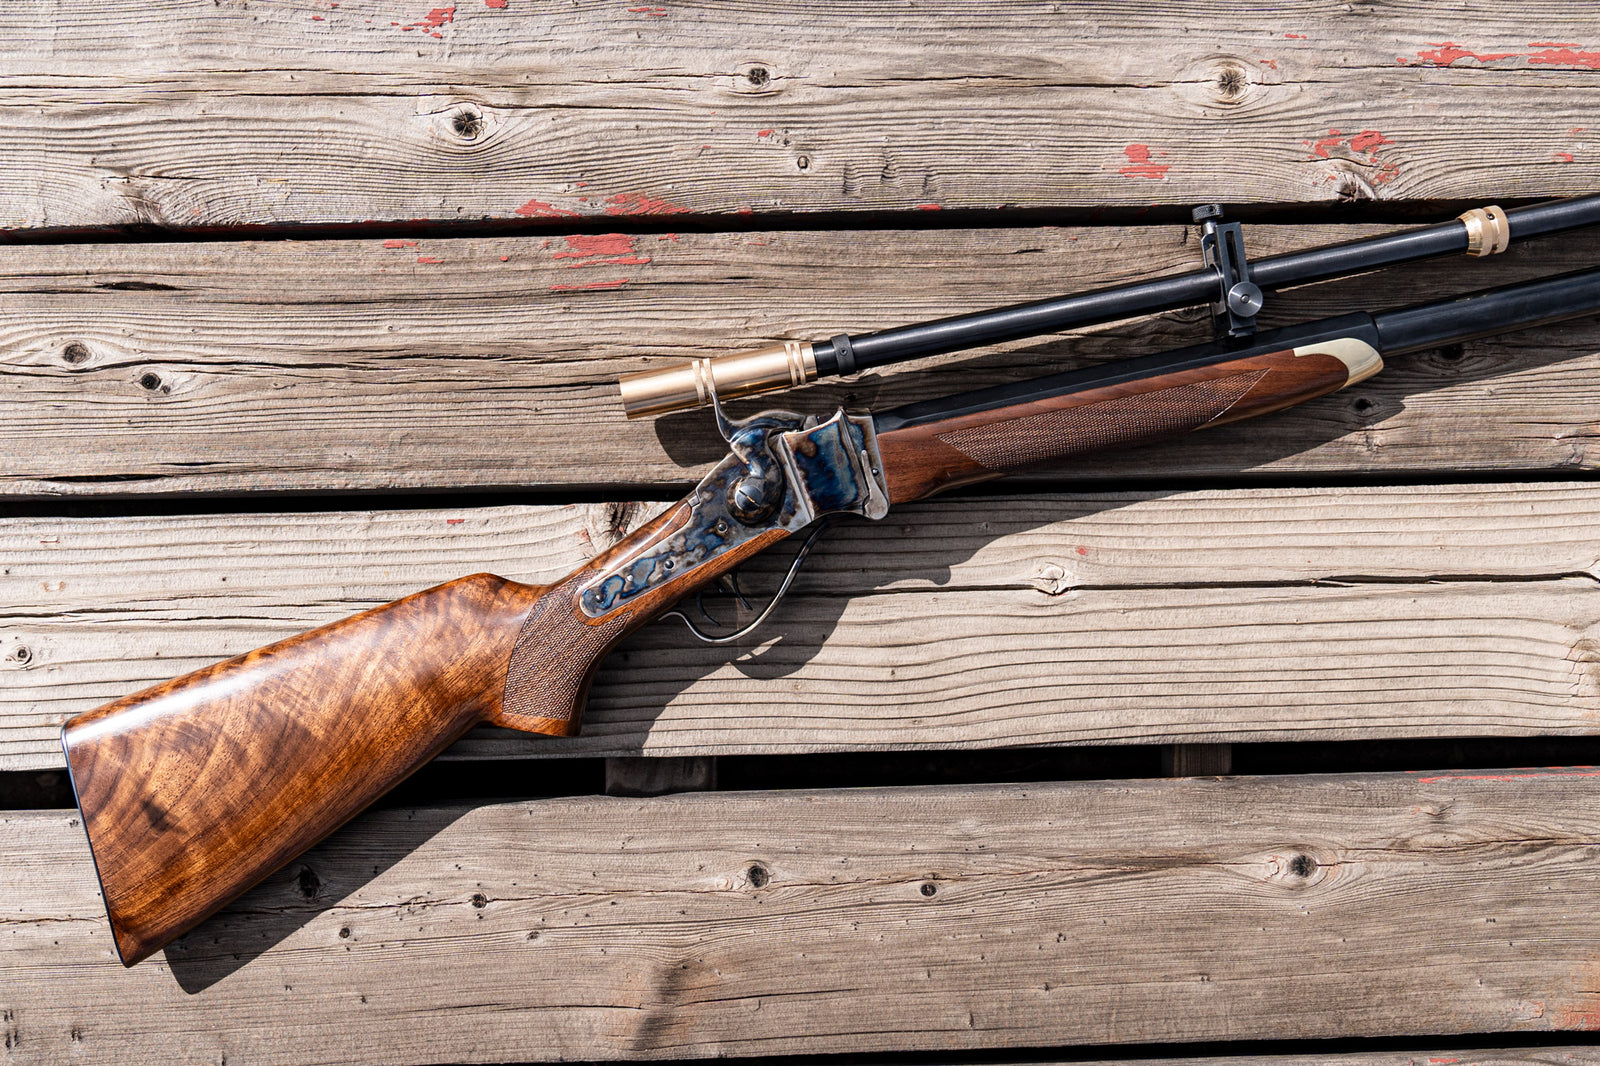
Based on designs from around the end of the Civil War, the 6X Long Malcolm is a faithful recreation based on the rifle telescope designs of the time. Before the creation of internal adjustments (the norm on modern scopes), these telescopes were moved via external adjustments. Turning a knob would literally move the body of the scope to point in a new direction.
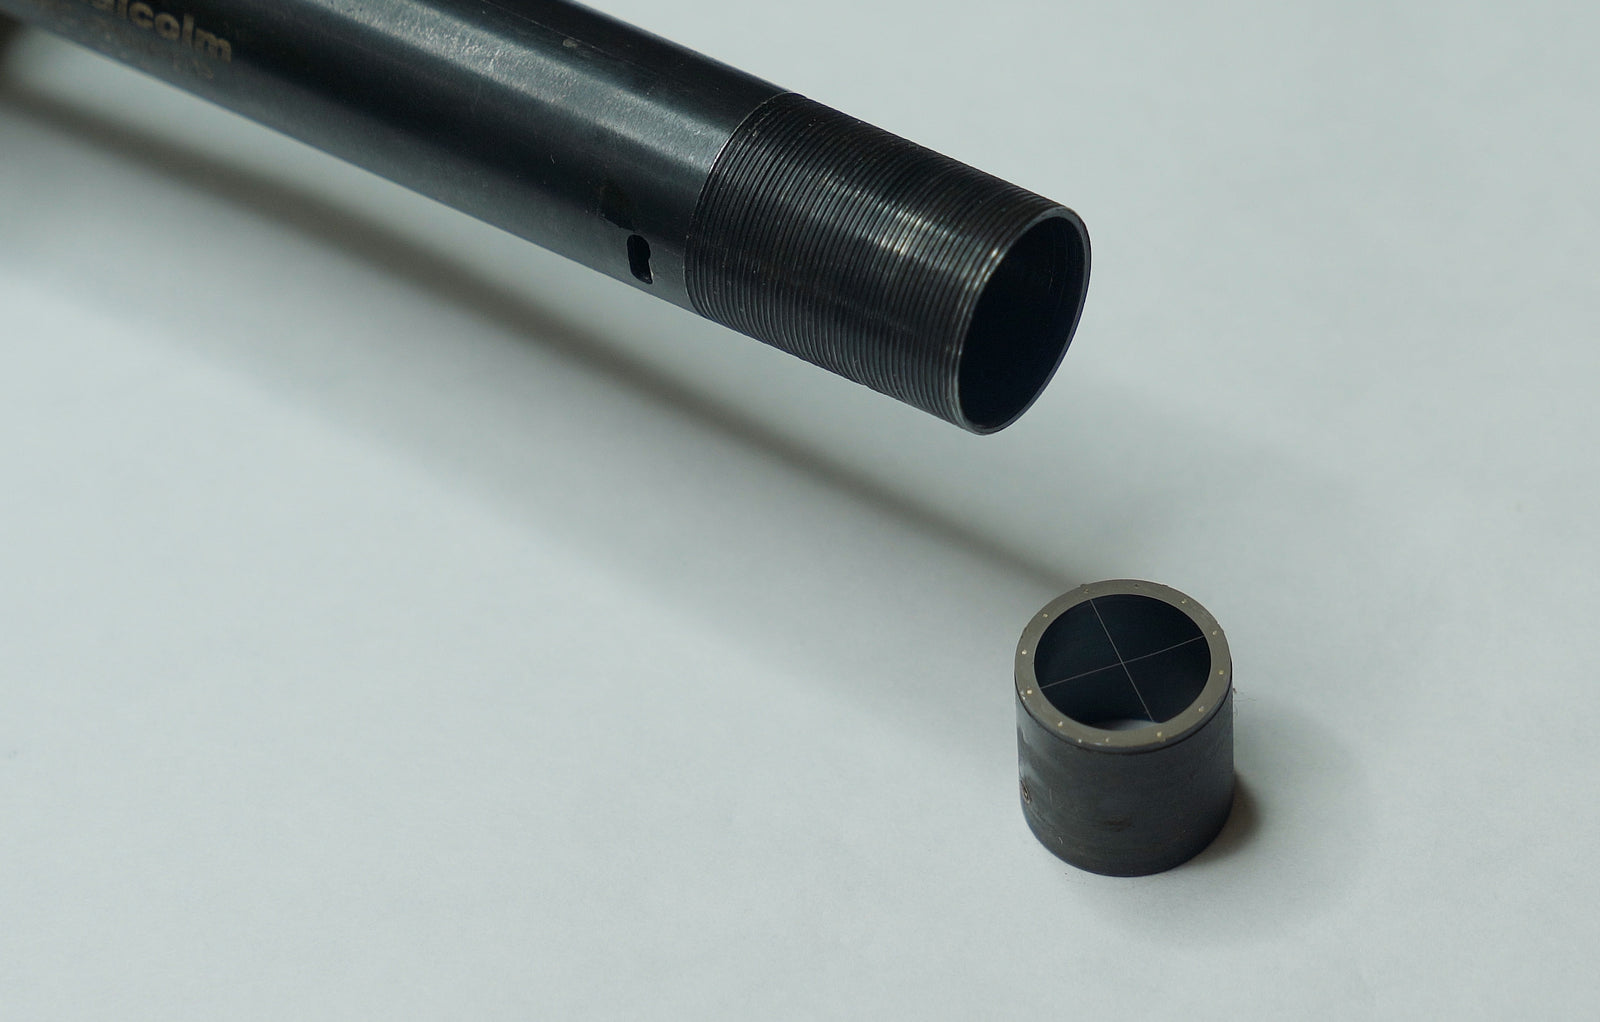
Such scopes existed before etched-glass reticles. Instead, reticles were formed from thin, lightweight materials such as spider silk, horse hair, or even human hair. Similarly, the methods of holding glass in place were not as sturdy as they are today. To help preserve the scope against the punishing recoil of rounds such as .45-70, scopes were built to slide. In essence, recoil would push the gun back. The scope, not held firmly by the rings, would wait out the momentum of recoil. After each shot, the scope would have to be pulled back into its at-rest position (battery position). This did not affect the point of aim, and helped reduce the chance of scope bite. Our scopes, though made of sterner stuff than their century-old predecessors, still retain this classic trait.

This scope is the combination of two important elements: the tube and the mounts. The next couple paragraphs will serve to lay out the components of the scope, though without much detail. Each piece will instead get its own expanded description later on.
The Long Malcolm scope has certainly earned its name, sitting at nearly 3 feet in length. At the rear end, closest to your face, you'll find the eyepiece. The eyepiece is touching up against a lock ring, which is snugged against the eyepiece to keep it from rotating. A short distance away is the reticle ring, identified by its two screws set at 180 degrees apart. This is the ring that holds the reticle frame in place, and which can also be used to level the reticle.
Moving from the eyepiece toward the objective (the end farthest away from you), we encounter a ring fastened in between two pillars (a.k.a. bunny ears). It is held via a crossbolt. To one side of the crossbolt is a locking thumb nut, and to the other side is a vertical adjustment screw and its accompanying index. This ring can be moved up and down to adjust the elevation of the scope. It does not hold the scope firmly in place, but merely acts as a guiding surface and stable rest point for the scope. A plunger at the top of the ring keeps constant pressure down against the body of the scope, maintaining a steady position along the axis of travel. This helps ensure that the scope does not change its point of aim when it is pulled back into battery.

As we cross the halfway point of the scope tube, we encounter the parallax ring. This ring can be rotated to adjust parallax from 10 yards out to infinity. Next up is the objective housing. Just like the name describes, it holds the objective elements. The end is threaded, and built to fit a sunshade. Sunshades are between 3" and 9", and meant to line the scope up with the end of the muzzle.
Nearing the end of the sunshade, we encounter the front ring. This ring serves two purposes simultaneously. The first is as a windage adjustment. Two screws (on the left and right) can be used to push the front ring to either side, allowing such an adjustment. The other purpose is that of a stopping point for returning to battery (the 'ready to go' position of a sliding scope). A thin ring with a protruding nub is attached to the sunshade, such that the nub can slip into a groove in the front ring and guide the scope to its correct orientation and position.
The above descriptions are a general overview, and not terribly detailed. Let's dive into those details below.
- Length: ~31" (without sunshade)
- Weight: 32oz
- Tube Diameter: 0.75" (3/4")
- Magnification: 6X
- Focus Range: 10 yards to infinity
- Mount Type: Direct dovetail sliding mounts
How to Use
This scope features all four classic adjustments. Windage, elevation, reticle focus, target focus (parallax).

To adjust the elevation, you'll use the rear mount (the bunny ears). First, loosen the locking thumb nut on the right side of the mount. This will allow you to make your adjustment. To change the elevation, simply rotate the thumb nut found at the top of the mount on the left side. Once an adjustment is made, tighten the locking thumb nut again to prevent the vertical adjustment from drifting under recoil. Always remember: adjust the eyepiece in the direction you want the impact to move. If you're shooting low and want to hit higher, move the eyepiece up.
To adjust windage, you'll have to make your way over to the front ring of the scope (nearest to the muzzle). This is adjusted via two side screws. Loosen the screw on one side, then chase it with the screw on the other side until the scope is locked in place. This adjustment is a mirror image of the elevation adjustment: Move the objective in the opposite direction of how you'd like the impact to move. If you are hitting too far to the right and want to move the impact left, adjust the objective end of the scope to the right.
Adjustment values can vary, and are determined by the distance between the front and rear mounts. The general rule is: closer mounts give a larger overall adjustment range with coarser adjustments, while farther mounts give a narrower adjustment range and finer adjustments. Both the front and rear mounts have index lines to help keep track of the adjustments, though you may have to do some math to determine the value of each line.
- Rear mount: 20 lines per inch, with one large line representing a one-inch position, medium lines representing half-inch positions, and the remaining small lines indicating 1/20th positions.
- Front mount: 20 lines per inch, with one large line indicating the middle position, and smaller lines to either side representing 1/20th of an inch adjustments.

Below is a chart showing adjustment values depending on the distance between the mounts (center to center):
| Distance | Val./Line (0.05") | Elevation (full 1.5") | Elevation / Turn (8-32 screw) | Windage (full 0.5") | Windage / Turn (M4 screw) |
| 20" | 8.5 MOA | 258 MOA | 5.3 MOA | 86 MOA | 4.7 MOA |
| 21" | 8.2 MOA | 245 MOA | 5.1 MOA | 81 MOA | 4.5 MOA |
| 22" | 7.8 MOA | 234 MOA | 4.9 MOA | 78 MOA | 4.3 MOA |
| 23" | 7.5 MOA | 224 MOA | 4.7 MOA | 74 MOA | 4.1 MOA |
| 24" | 7.2 MOA | 215 MOA | 4.5 MOA | 71 MOA | 4 MOA |
The scope is able to slide, and uses this feature to avoid the majority of recoil's effects. When a round is fired, the rifle kicks back. The scope stays right where it is, as the rifle slides by underneath (this will give the appearance that the scope slides forward on each shot). After each shot, you'll need to pull the scope back to its normal position (back to 'battery'). The sliding does not affect the precision or aim of the scope, but a fully-forward scope will make it difficult for you to get your cheek into the right spot on the stock.

At the objective end of the scope (attached to the sunshade), you'll find a lock ring. This lock ring has a small nub protruding in the direction of the eyepiece. When the scope is pulled back into battery, this protrusion settles into a groove cut into the front ring, which serves as both a stopper (to stop the scope at the appropriate 'battery' position) and an alignment guide (to ensure the scope is rotated to the proper orientation). To set the stopper ring, loosen the three allen screws around its circumference. With the ring loose, you can position the scope for battery position and rotate the scope to ensure the reticle will be level. When the scope is in the right spot, rotate the lock ring to fit into the front ring's divot, then tighten the three set screws.
The reticle can be leveled (or removed) quite easily through another means - the reticle lock ring. Near to the eyepiece, you'll find two rings. One ring (nearest the eyepiece) is used to lock the eyepiece in place. A little further towards the object end, you'll find another ring. It has a knurled circumference and two small screws set at 180 degrees apart. This ring holds the reticle frame in place. If you loosen the two screws, the ring can be used as a gripping surface to rotate the reticle. When the reticle is leveled appropriately, simply tighten the two screws to lock the reticle in place.
Please note - to remove the reticle frame you'll need to take things a bit farther. Instead of just loosening the screws, you'll have to remove them completely. Furthermore, you'll have to unscrew the eyepiece. With the eyepiece and reticle locking screws out of the way, the scope can be tilted back to allow the reticle frame to slide out.
Another very important note - the reticle wires are easily bent. Be gentle, and do not touch the reticle directly.
To set focus at the eyepiece, turn the eyepiece until the reticle is sharp. This will set the eyepiece of the scope to your glasses' prescription. Once the eyepiece is set correctly, snug the eyepiece lock ring against the eyepiece to lock it in place. When it is set correctly, the eyepiece does not need to be adjusted unless your prescription changes or you swap out eyepieces on your scope.

This scope, in contrast to earlier versions of the Malcolm 6X Long Scope, includes the ability to adjust parallax. Parallax (target focus) is quite important for externally-adjusting scopes, as your head position will be regularly changing when the scope is adjusted. Having the scope set at the proper parallax will prevent reticle drift that occurs from head and eye position shifts. To set the parallax, turn the brass parallax ring until the proper setting is found. This brass ring is about 2/3 of the way toward the objective end.
Redesigning the optical path of this scope to allow for parallax adjustment allowed us to make one other change: the scope can now accept eyepieces of different magnifications. Currently, this scope is configured to accept both a 6X and a 10X eyepiece. To change the eyepiece, unscrew one eyepiece and replace with with a different one. You'll have to set the focus again, though that should only take a few moments.

How to Mount
Preparation
This scope mounts up using the direct dovetail mounting kit. This mount set utilizes two dovetail cuts in the barrel - one near the muzzle, one back near the chamber. Assembling the kit involves a few screws, a few drops of loctite, and very little else. The parts are pre-attached when shipped to prevent them becoming lost in the box, and will have to be taken apart before installation.
To get everything ready:
- Remove the rear mount from the scope. If the rear ring is already attached to the scope, there's no reason to remove it; Removing the bunny ears is sufficient. First, remove the small set screw from the face opposite the index. This will allow you to remove the vertical adjustment screw, which is conveniently the second step. Next, remove the thumb nut that is attached to the crossbolt, and remove the crossbolt as well. Finally, remove the set screw from the ring, which can be accessed through the vertical cut in the side of the bunny ears.
- Remove the base from the front ring. This is done by remove one or both of the side positioning screws from the base, then sliding the upper half sideways until it detaches from the lower half.
Installation
The actual installation will be broken into three stages. Before any of those stages start, I recommend making your life a little easier by removing the iron sights from the rifle. This should free up both dovetails on the barrel.
The first stage is where the bases will be attached to the rifle. Different manufacturers have different standards for dovetail size, so choosing the correct dovetail is important.
- The rear base is meant to fit the rear dovetail slot. Slide the rear base into the dovetail cut and center it as best as you can. When the base is properly placed, tighten the center set screw to lock the dovetail in place. I'd recommend putting a bit of blue loctite on the set screw before finally fastening it in place.
- With the rear base in place and loctited down, it's time to attach the bunny ears. Turn the bunny ears so that the index is facing back toward the shooter. Line up the two holes at the bottom of the bunny ears. Then, fasten the two screws through the bunny ears and into the base. Blue loctite should be placed on both of these screws.
- The front base goes into the front dovetail slot. The front base has an index on one side, which should be faced back toward the shooter. Center the base as best you can, then tighten both set screws down onto the barrel. I'd recommend putting a bit of blue loctite on the set screws before finally fastening them in place.
A side matter needs to be addressed: the attachment of the sunshade to the scope. Attaching the sunshade merely requires it to be screwed into the end of the objective housing. I recommend a couple drops of blue loctite on the threading to ensure the sunshade does not loosen over time.
Next up, it's time to attach the rings to the scope tube. Starting with the rear ring:
- Remove the eyepiece, eyepiece lock ring, and reticle lock ring from the scope. Please note, with the reticle lock ring removed, the reticle frame will be loose inside the scope. If the scope is tilted back, the reticle frame will slide out. I recommend keeping the scope tube level or pointing the objective end downward to prevent this.
- Find the rear ring, plunger, and plunger spring. Stuff the spring into a pocket located at the top inside of the rear ring, then place the plunger onto the spring. With the spring and plunger compressed into the pocket, slide the rear ring onto the scope. Ensure that the vernier scale is facing back toward the shooter before placing the ring onto the scope tube.
- Slide the ring forward a few inches to ensure it's on the scope tube. The exact positioning will be handled later. Reinstall the reticle lock ring, eyepiece lock ring, and eyepiece. These rings will also be adjusted later, so their precise setting isn't important at this point.
And now for the front ring...
- The front ring has a curved spring plate that is attached via screws to the front ring. Install the spring first, with the bulk of the spring facing towards and extending past the index on the base of the ring.
- Slide the front ring onto the sunshade, with the index facing back toward the shooter. The front ring has an angled cut into the top of the ring, which should be facing forward toward the muzzle.
- Slide the front lock ring onto the sunshade. The front lock ring has a short extension. The extension should be facing back toward the shooter, such that it can potentially line up with the angled cut of the front ring.
The front ring and lock ring will be positioned later, when the rings are attached to the bases. For now, just snug up the set screws on the front lock ring so that the ring doesn't slide off the sunshade.
And finally, without further ado, it's time to attach the scope to the rifle.
- Start by sliding the front ring onto the front base. Once the ring is on the base, install the two windage adjustment screws and snug them up.
- Drop the rear ring into the space between the bunny ears. You may have to push the rear ring into place, depending on where it was left when it was put on the ring.
- Slide the crossbolt through the bunny ears, so that it goes through the hole in the base of the rear ring.
- Drop in the vertical adjustment screw, which has a home in the index side of the bunny ears. When the vertical adjustment screw meets the crossbolt, rotate the vertical screw to thread it through the crossbolt's threading.
- Install the set screw in the side of the rear ring, via the hole visible through the gap at the side of the bunny ears. It's a very small screw, and my fat fingers have a tough time lining it up. I prefer to use needle-nose pliers or tweezers to place the set screw. You can loctite this screw, but it doesn't require it.
- Install the thumb nut onto the exposed, threaded end of the crossbolt.
- Install the set screw that presses against the vertical adjustment screw. This screw can have loctite applied if you want to, but there is no need for it.
The scope is now fully installed. There were many small parts that needed to be installed in the proper order. The good news is - you only need to do this once.
Adjusting the Scope for the Shooter
Now that the scope has been fully installed, it's time to set the eyepiece focus, set the eye relief, and level the reticle.
To set the eyepiece for the shooter : rotate the eyepiece until the reticle is sharp. This is easiest to do against a plain background such as the clear blue sky or a plain wall. Once the reticle is sharp, snug the eyepiece lock ring against the eyepiece.

- Get behind the rifle in the normal shooting position you'll be using.
- Push, pull, and rotate the scope until you have a level reticle and full field of view.
- Unmount from the scope. Holding the scope firmly in place with one hand, use the other hand to snug the front lock against the front ring. Ensure that the lock ring's projection snugs into the front ring's angled cut.
- Tighten the front lock ring's set screws. These can be loctited if you desire.
Get back behind the scope and check the view again. Push the scope forward and pull it back into battery position. If the eye relief and reticle level are good, then you're done with the setup. If the eye relief is good but the reticle is not level, the reticle lock ring can be used to level the reticle. If both the eye relief and reticle level are not good, simply loosen the front lock ring and start the above process again.
Further Details
Over the years and across the different manufacturers, many different dovetail sizes have been employed. 3/8" is the most common, but here's a list of other possibilities based on the rifle or barrel manufacturer:

| Rear | Front | |
| Pedersoli | 0.375" or 0.500" | 0.375" |
| Uberti | 0.375" | 0.375" |
| Shiloh / C Sharps | 0.475" | 0.435" |
| Chiappa | 0.625" | 0.375" |
These are the expected 'perfect' sizes for the dovetails. Due to differences in tolerances and wear on the manufacturer's tooling, the dovetail may be a slightly different size. If the dovetail block is far too large, it may be necessary to grind down the block a bit. If the dovetail cut is too large, shims may be necessary.
The scope needs to reach the dovetail down at the muzzle to mount up properly. With many possible barrel lengths, this is done by swapping out the sunshade, which threads into the objective end of the scope.
Barrel and sunshade lengths:
- 28 inch barrel: 3 inch sunshade
- 30 inch barrel: 5 inch sunshade
- 32 inch barrel: 7 inch sunshade
- 34 inch barrel: 9 inch sunshade
The scope comes with a 5" sunshade (for a 30" barrel) in the kit. If your barrel is longer or shorter, you will need to order the appropriate length of sunshade.
Please note, this is a chart for most varieties of these old rifles. Custom rifles with especially long stocks, unusual actions, or an unusually-placed chamber may require a slightly different length.


Leave a comment (all fields required)