

Jim Leatherwood developed the ART scopes during the 60's to solve the important problem of range estimation.
In Automatic Mode, the ART scopes can range targets of known dimension and compensate for the bullet's trajectory in one action.
But, what if you wanted to increase the magnification more than what was given by Automatic mode?
For example, this could be when you are initially zeroing at 200 yards with the M1000-PRO. In Automatic mode, you need to be at 2X.
The Solution? Use Manual Mode.
The Leatherwood ART scope has two modes of operation, automatic and manual. If you want to use the Frame Aim and Shoot Technique (FAST), you need to be in Automatic Mode so that the cam can compensate for your bullet drop.
In Manual mode, you can set the cam distance (bullet drop) and the magnification independently.
Engaging Manual Mode

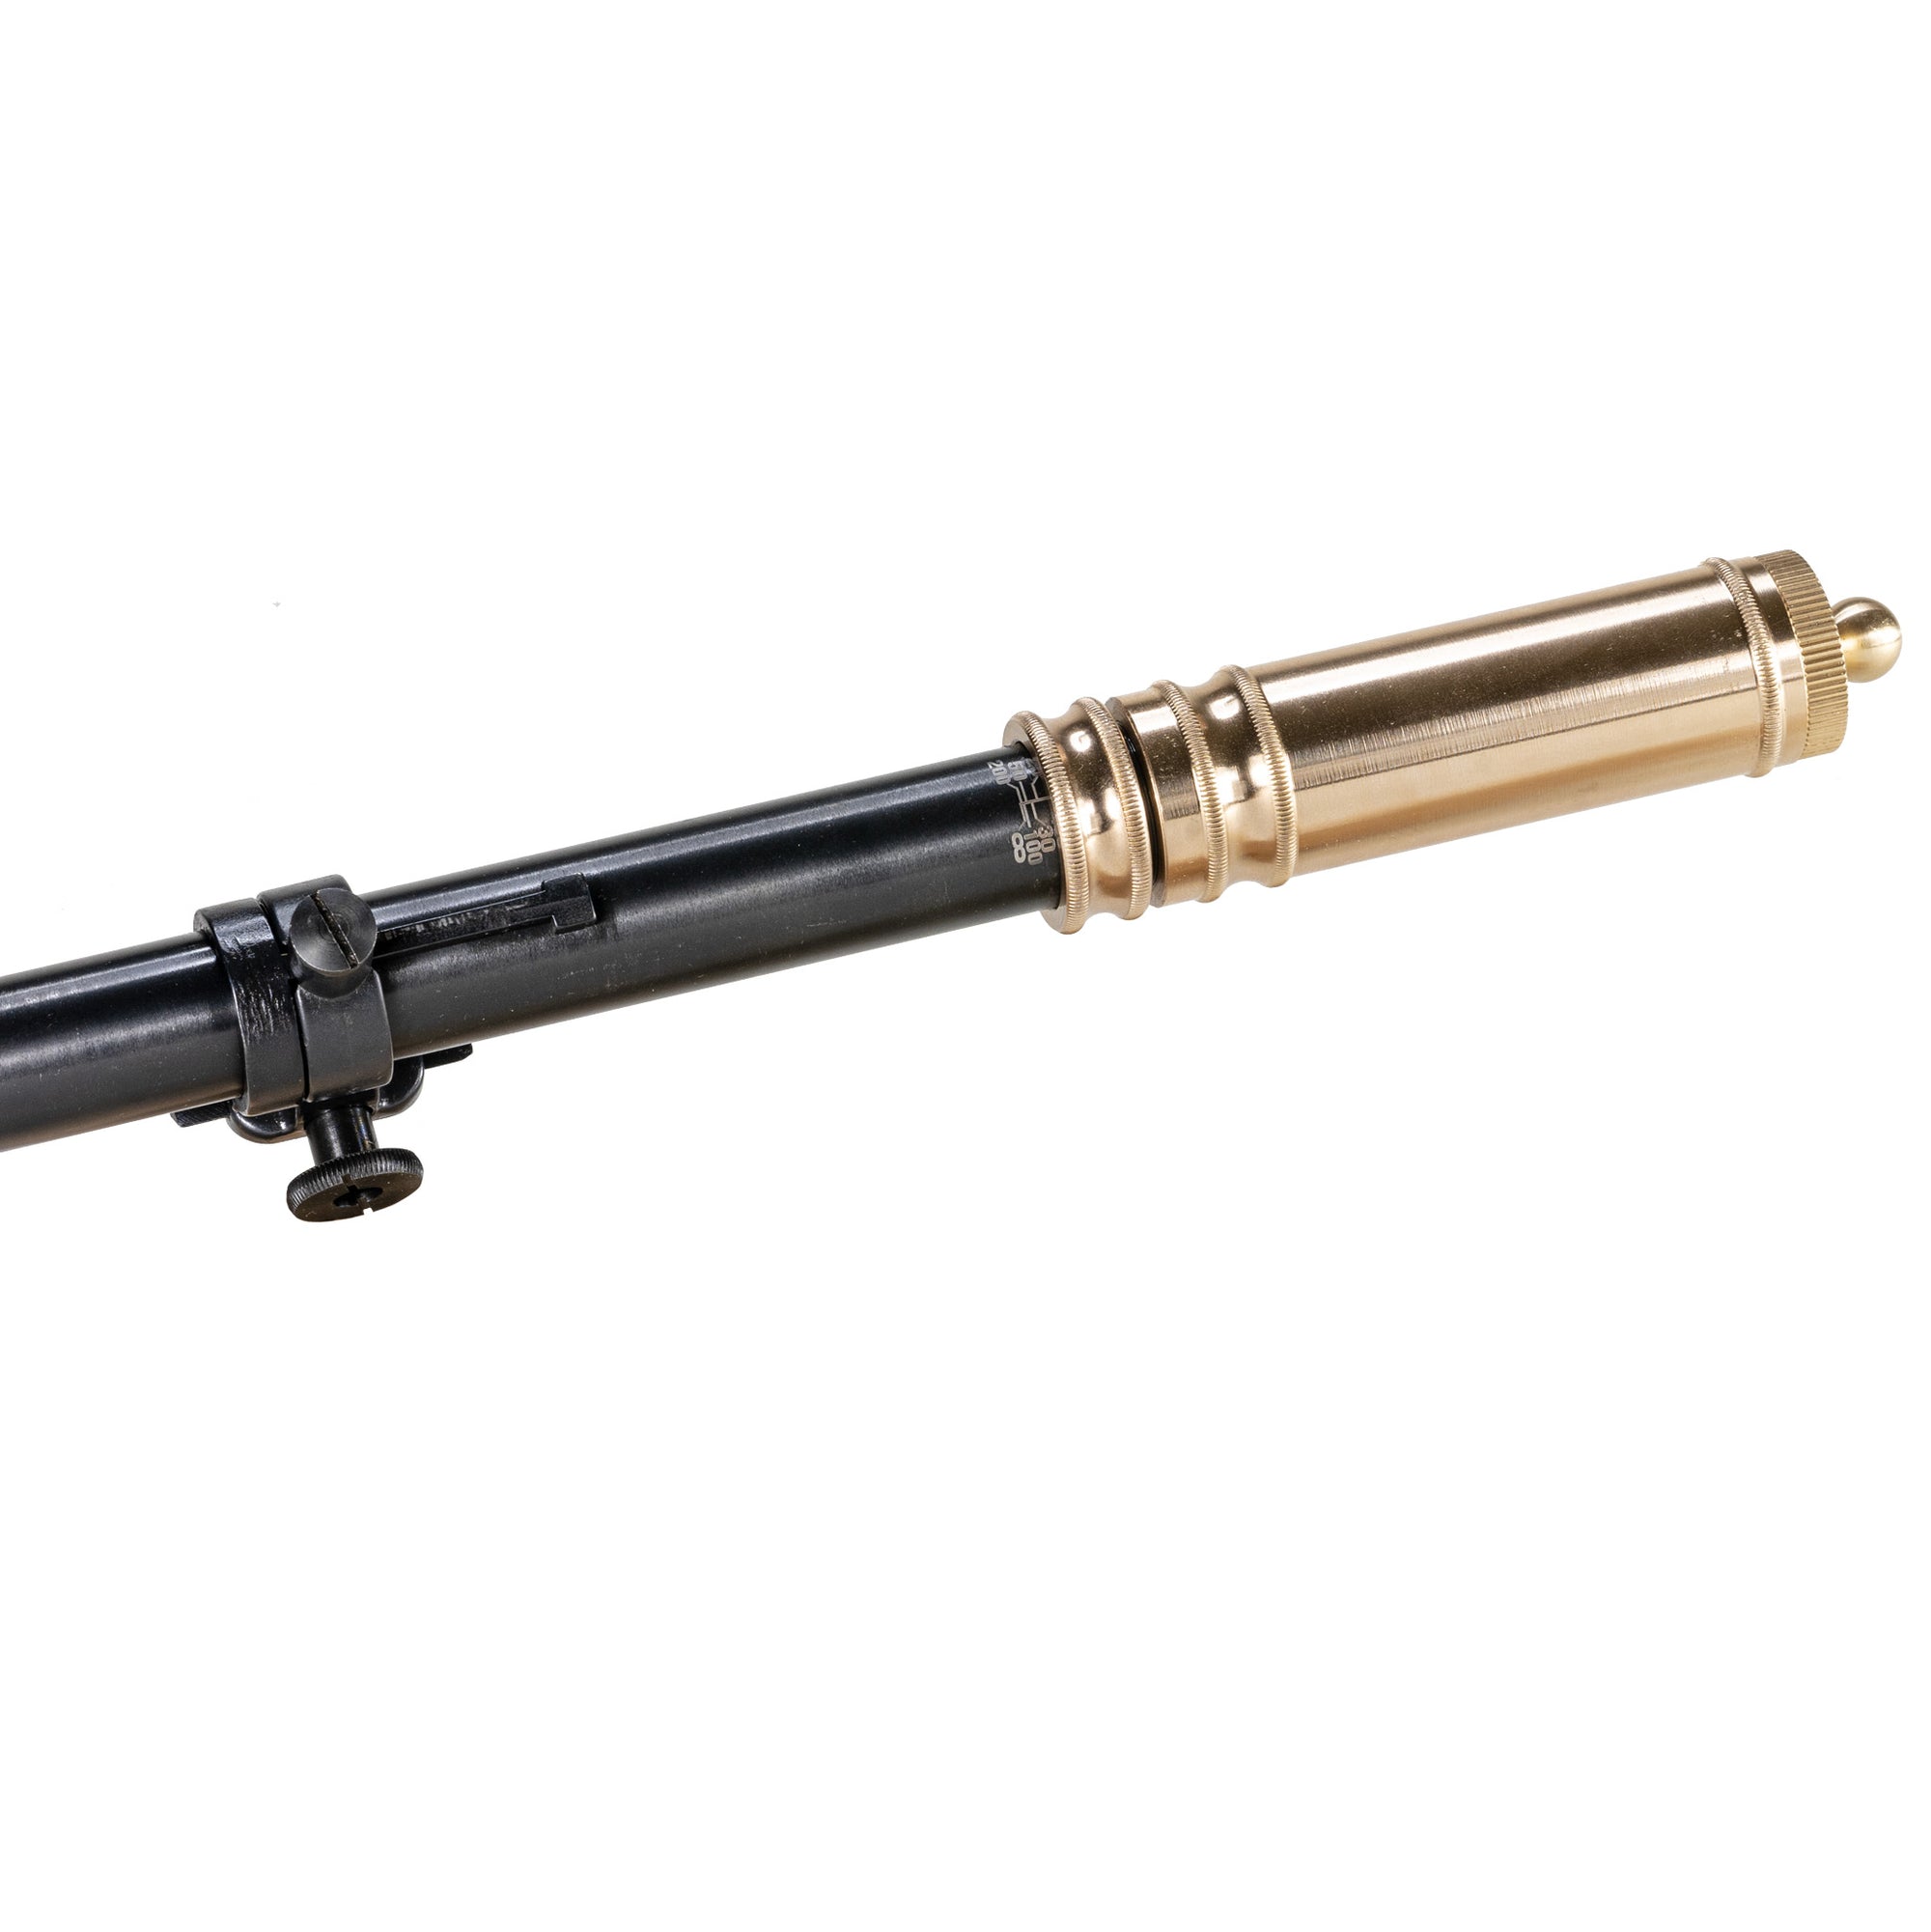
To engage manual mode on the ART scopes, simply loosen the thumbscrew on the Range Ring and pull it back towards the Eyepiece.
This will uncouple the Range Ring from the pins on the Calibration Ring.
Now the ART scope is in Manual Mode.
To re-engage to Automatic mode, line up the two thumb tabs on the Calibration Ring and Range Ring and couple them together.
Changing Magnification
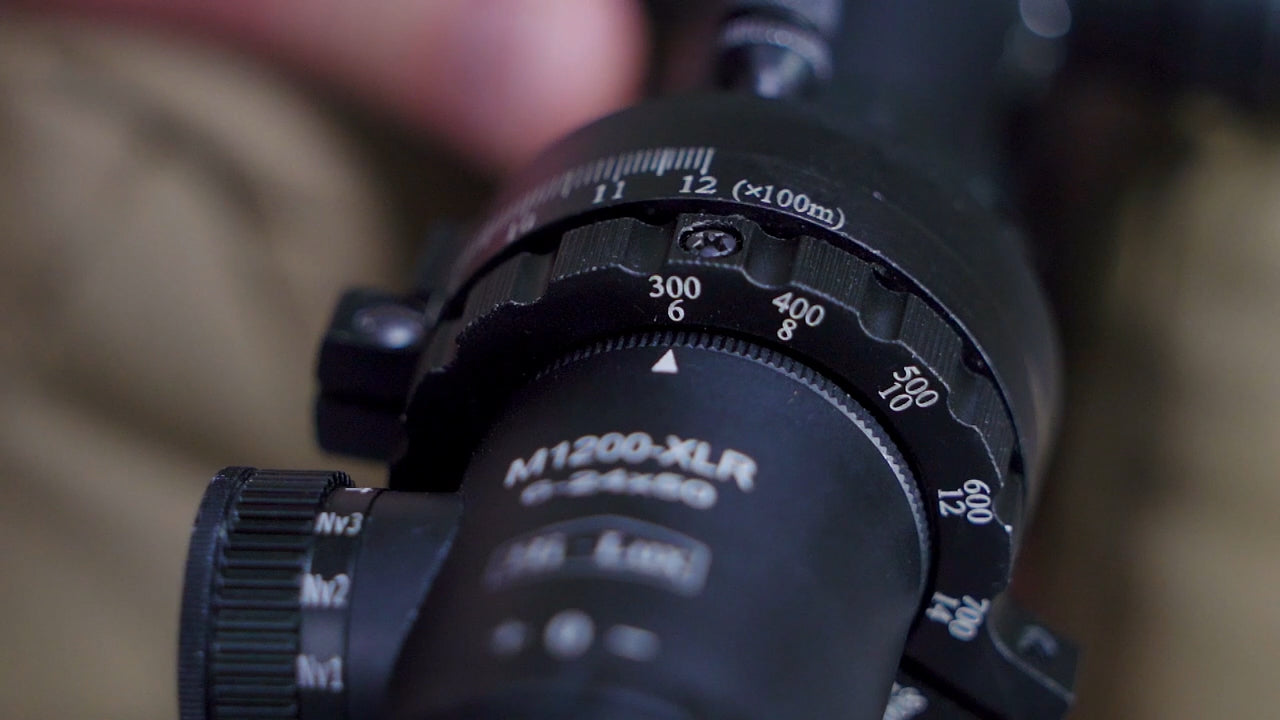
To change magnification in Manual Mode, turn the Range Ring. There are two numbers on the face of the Range Ring.
The Top Number refers to the Distance that the cam is compensating for in Automatic Mode. You can ignore the Top number when you are in manual mode.
The Bottom Number refers to the current power setting. Line up the arrow on the eyepiece (henceforth referred to as the Eyepiece Indicator) with the desired magnification setting.
Setting the Distance on the Cam Manually:
In Manual mode, you will set the distance using the hashmarks on the Calibration Ring and the Eyepiece Indicator.
There are a number of marks on the Calibration Ring that span from the minimum ranging distance to the maximum ranging distance.
On the ART X-BOW, these marks index from 20 to 80. On the M1000-PRO, these marks index from 200 to 1000. On the M1200-XLR, these marks index from 300 to 1200.
Simply line up the Eyepiece Indicator with the appropriate hashmark on the Calibration Ring for the distance you want to shoot.
NOTE: The Calibration Ring is the same ring that you use to set the Cam Setting. The Arrow on the Trajectory Cam should point at the same Cam Setting as you turn the Calibration Ring.


Leave a comment (all fields required)