


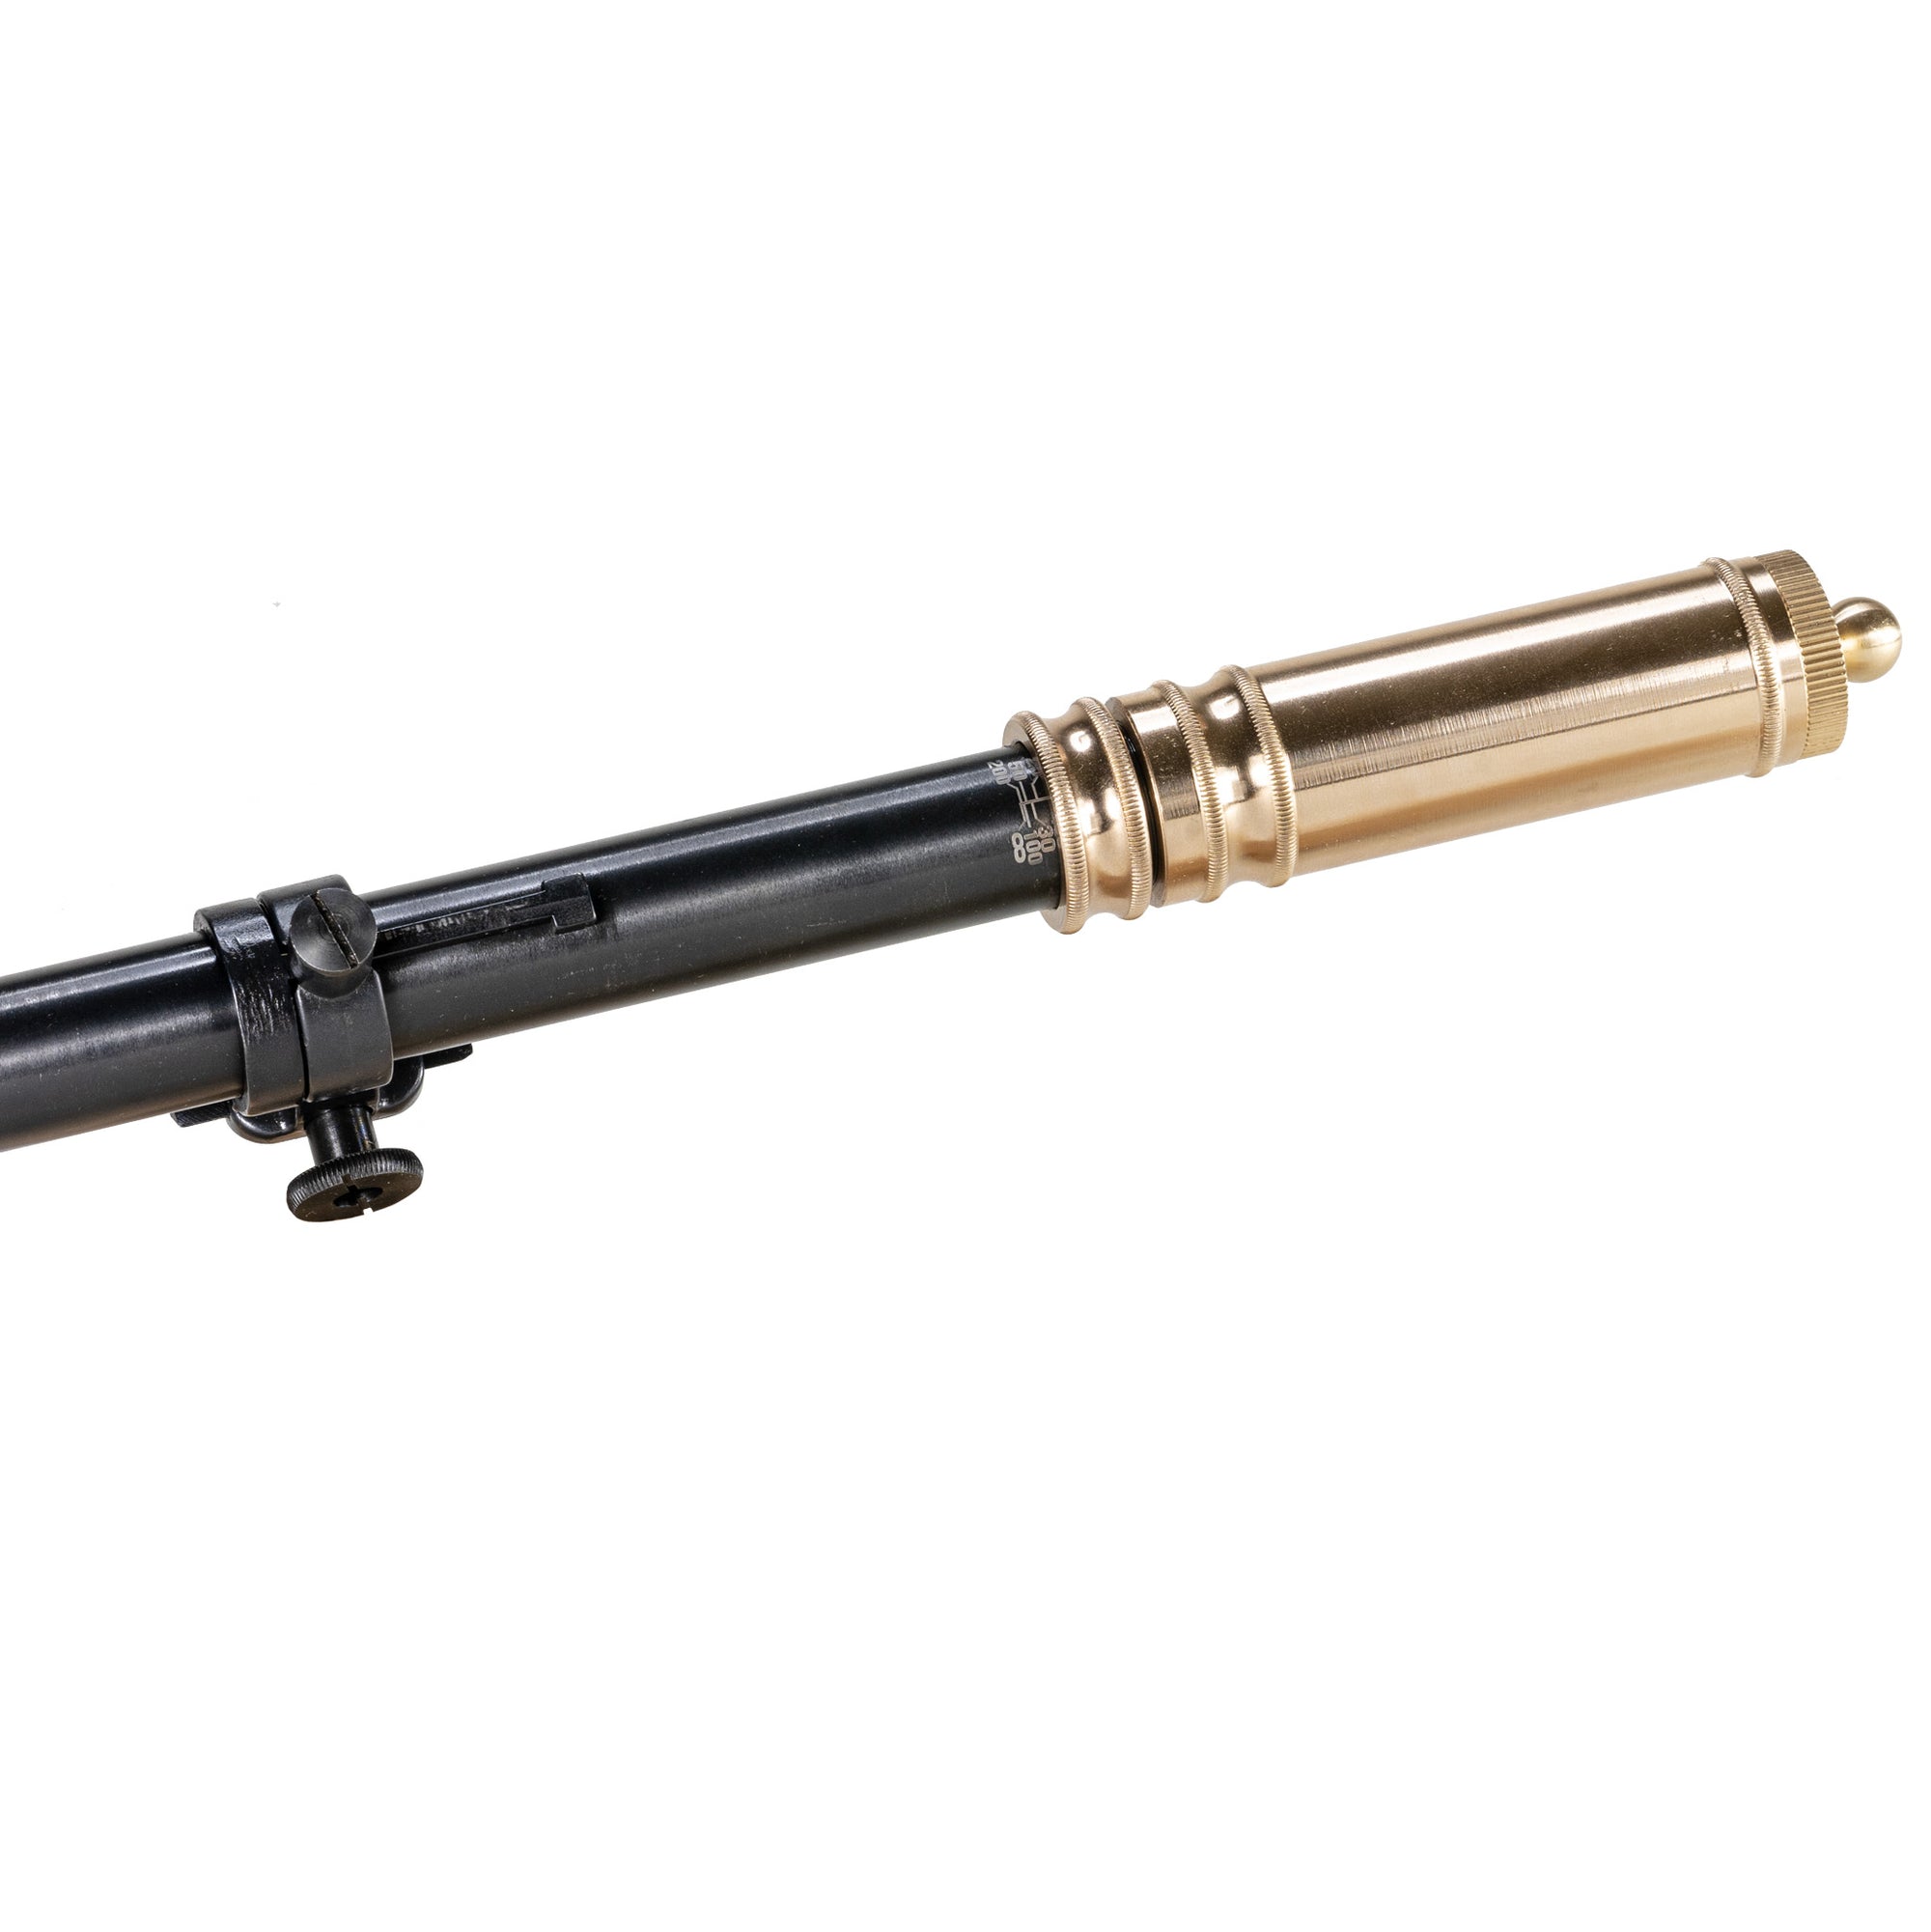
It is critical to properly set the locking nut within the crescent groove of the standard bases. Although the Malcolm 8X scope mounts have been calibrated at the factory to properly fasten to the provided crescent cut bases, you may need to adjust the friction screws in the mount.
In this video, we’ll be going over how and when you should adjust the friction screws within the Malcolm 8X USMC mounts.
If the locking nut does not have sufficient range of movement to lock down on to the crescent cut base or if the crossbolt is damaged, you will need to adjust the set screws.
DO NOT CRANK DOWN ON THE Locking nut with tools, if you do not have enough travel. You will damage or strip the threads on the locking crossbolt.
Instead, we will need to adjust the friction screw and “set” the travel for the locking nut.
You will first need to remove the scope from the scope mounts. You can follow along with this tutorial video to uninstall the mounts.
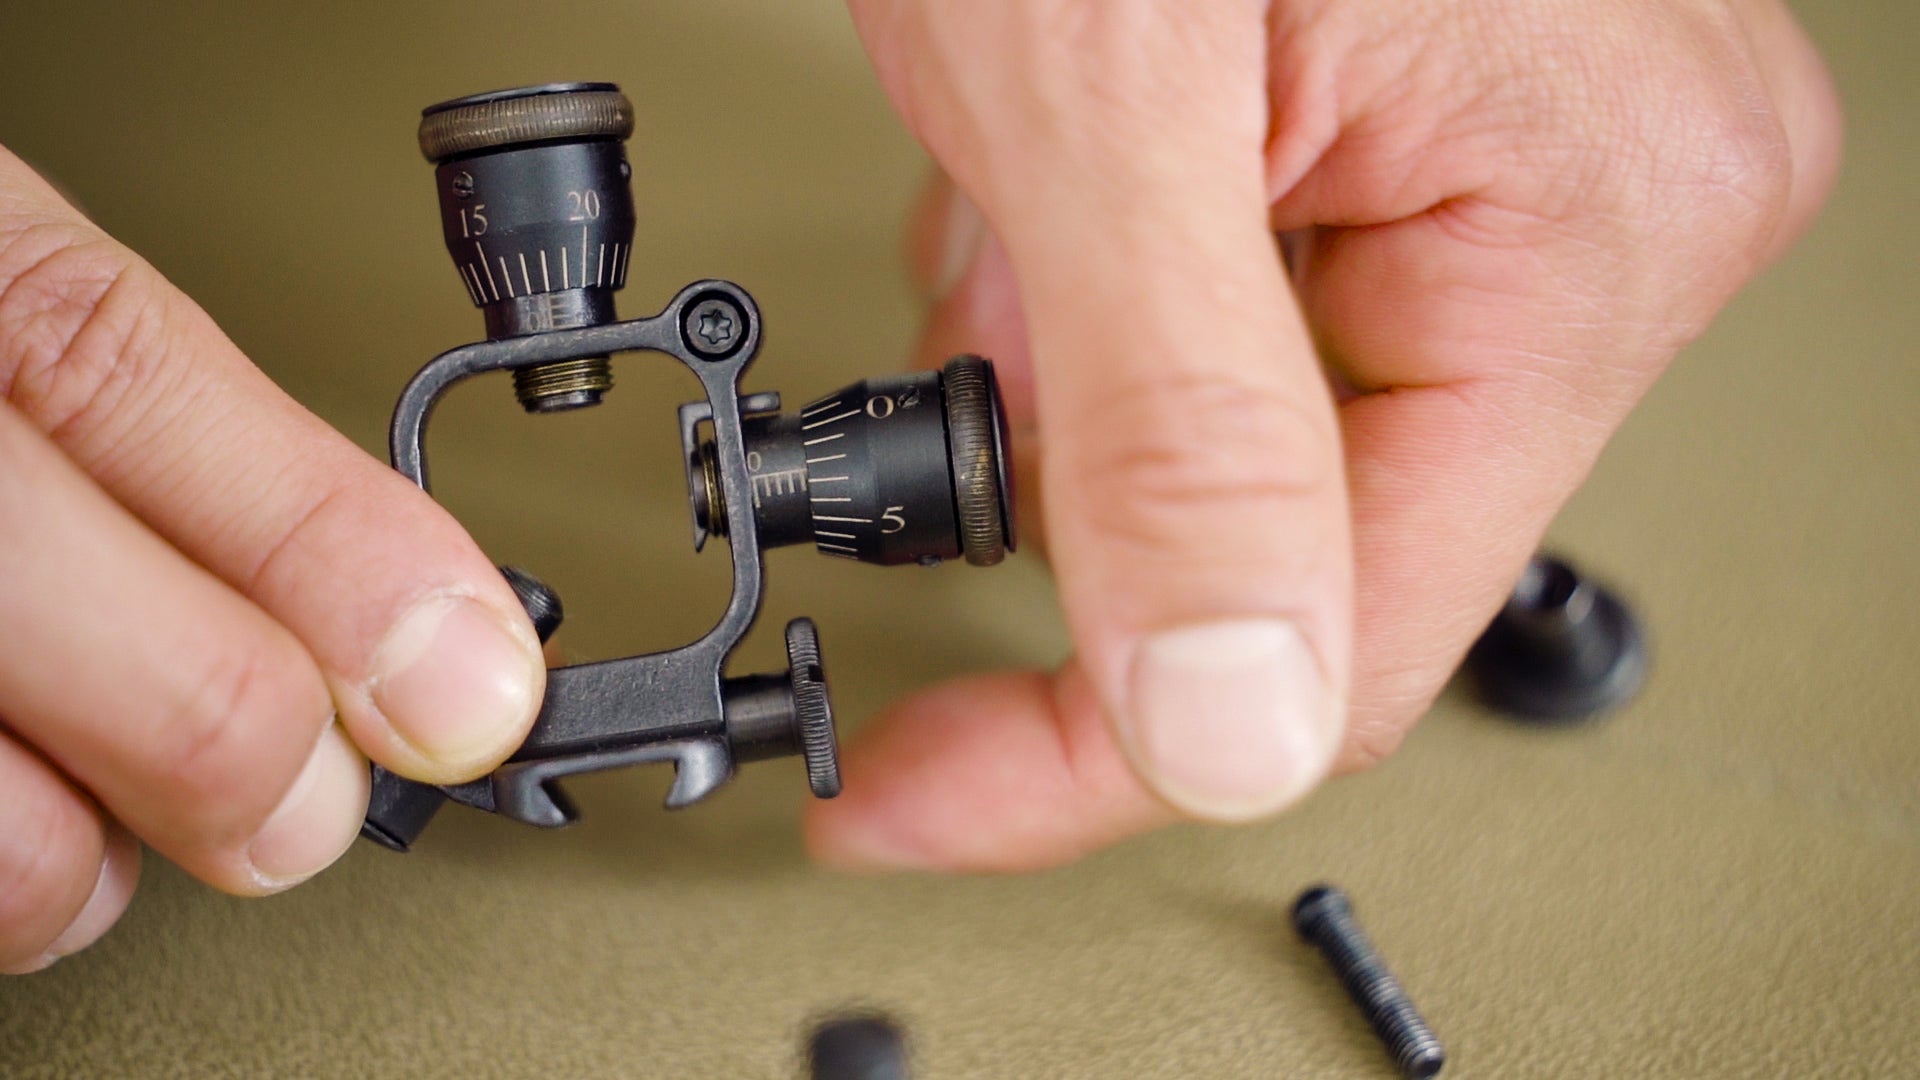
Once you have removed the mounts, remove the top cap screw from the front ring. Once the front ring has been removed from the pope rib, the plunger will be loose. Take extra care not to lose the plunger once you have removed the front ring from the scope body. Once the cap screw, spring and plunger have been removed you will have access to the friction set screw at the base of the front ring.
The rear mount friction screw is located in the same position at the bottom of the mount. The front and rear mount set screws are essentially friction screws hold the mount’s locking crossbolts in place.
To remove the crossbolt or adjust the locking nut’s range of travel, you will need to first loosen the set screw.
After loosening the set screw, you will be able to remove the locking nut and crossbolt.
If the crossbolt is bent, you will need to replace it with a new one.
Now, we will proceed to setting the travel of the locking nut on the crossbolt. Start the threads on the crossbolt into the mount.
Turn the mount upside down, and turn the locking nut so that it will just clear the crescent cut base. This will set the maximum range that you can back the locking nut out. Check to make sure your base can slide freely in the mount when the screw is in the “backed out” position. If the base slides freely, you can proceed.
Now, tighten the crossbolt down while holding the thumbnut. You will need to use a screwdriver to tighten the crossbolt. This ensures that the crossbolt is set all the way in the female threads of the mount.
Once the crossbolt has been tightened, you can tighten the set screws in the mount to finger tight. The set screws do not need a lot of torque - 2-3 in lbs should be enough.


Leave a comment (all fields required)